

This next dish we had was SOOOO good and a definite keeper. Originally I was going to use turkey cutlets which are nothing more than a turkey breast that has been sliced long ways into 1/4 inch thick slabs of meat.
You can usually get quite a few of these cutlets from a turkey breast and its a little bit of a pain to do so you can always ask your butcher at the store or if you are going to do it at home. You would want your breast only half frozen because the freezing will make it more dense as you are cutting to get a nice horizontal cut. You would cut with the breast flat on the cutting board and your knife parallel to the counter. Keep the knife approximately 1/4 of an inch above the board as you are going through the breast horizontally. Once you have one done remove the cutlet from under whats left of the breast to a plate and then put the whole breast back and do it again. Continue until you have sliced the breast down completely into cutlets. If they get to thick you can wrap the cutlets in plastic wrap and pound them slightly to make them even and approx 1/4 inch thick.
Wouldn't you know the store didn't have turkey breast or cutlets when I went. They had tenderloins and I though about making with that until I saw they had a frozen bag of chicken cutlets for cheaper than the packaged tenderloins. So you can guess I said "Bring on the chicken cutlets!!" LOL
Everything else in this recipe stayed the same EXCEPT the type of poultry. So don't be afraid to make a change if you need to or it saves you a couple bucks. After all now we have half a bag of chicken cutlets in the freezer to make this VERY Tasty dish again. Thats always a good thing!
Turkey Parmesan
1 cup low-sugar pasta sauce
1/2 cup pine nuts, coarsely chopped
1/4 cup freshly grated Parmesan cheese
1/2 teaspoon dried Italian seasoning
3 individual turkey cutlets, about 1/4 - 1/3" thick
1 teaspoon extra-virgin olive oil
1/4 cup ounce shredded part-skim mozzarella cheese
Salt and freshly ground black pepper
Heat oven to broil. Bring sauce to low simmer in a small saucepan over medium-low heat. Remove from heat and cover to keep warm. (if you have any of the sauce left over from the chicken cacciatore like we did add it to it to give it more flavor or doctor the jarred sauce to suit your family but obviously you can leave out the meat as its already included with the turkey)
Stir together coarse chopped pine nuts, Parmesan, and Italian seasoning in a wide, shallow dish. (Or you can put them all in a food processor and buzz them up til it resembles bread crumbs) Season turkey on both sides with salt and pepper, then dredge both sides in the nut mixture, pressing to adhere.
Heat oil in a large nonstick skillet over medium heat. Add turkey and cook until coating is golden brown and juices run clear, about 4 minutes per side. If nuts brown too quickly, reduce heat. (If you don't use a nonstick skillet be prepared that this will stick to your pan as the cheese melts. If you have enough oil, your heat is around medium, and you don't mess with it once you put it down in the pan and until you need to turn it, you wont loose much of the crusting. Also you can scrape out what crusting does stick once you remove the turkey and place it on your turkey prior to putting the cheese on so you will still get the nice toasted crunchy flavor, the cheese and sauce will hide it. LOL Careful though as it will be HOT )
Place turkey on a foil covered sheet pan, top evenly with mozzarella, and broil until cheese melts, about 30 seconds. (I just re-used the pan I baked the Spaghetti Squash on. Please see the Spaghetti Squash/Spaghetti Pie recipe I did earlier for how to roast it. I did the same thing here only I made sure the squash would be ready about the time the turkey would need to go to the oven so I could scrape the squash out immediately for serving)
Place approx 1 1/2 cups of spaghetti squash on the plate top with 1/2 cup of warm sauce on each plate and top each with a piece of turkey. Serve additional sauce on the side.

My Dad LOVES Chicken Wings and has been asking for some. Usually I would fry them but I am trying to make everything healthy so I decided to try this on the wings. This is what came out.
Baked Chicken Wings
10 – 12 chicken wings
3 tbsp of soy sauce
½ tsp of garlic powder
1 tsp of paprika
1 tsp of cayenne pepper
2 tsp sugar
Salt and pepper to taste
3 tbsp of soy sauce
½ tsp of garlic powder
1 tsp of paprika
1 tsp of cayenne pepper
2 tsp sugar
Salt and pepper to taste
Wash and clean the chicken wings to make sure there are no stray feathers. Cut wings into portions through the joints, discarding wingtips. ( I would freeze the tips and use them to make a stock or a soup base personally)
Combine all the rest of the ingredients in a liquid measuring cup. Place wings in a gallon ziplock and then pour the mixture over the top and seal the bag. Massage the bag to move the marinade around and evenly coat all the wings. Refrigerate overnight, flipping the bag over and moving the wings around some.


Preheat oven to 425 degree F. Cover a baking dish with aluminum foil. Spray heavily with no-stick oil spray. Spread wings evenly over the pan. Roast for 40-45 minutes or until golden brown. Turning the wings half way through the baking.


Serve warm, cold or they can sit out at room temperature for your next football game party!
You know the wings are good when you eat them cold like fried chicken you would take on a picnic and you love them. These --- I definitely would do that with!
I was discussing some thing I was making with a friend of mine and we were discussing the Mexican Soup I had made and that I was going to make French Onion Soup and He asked about a Tomato Soup. My Mom Loves Tomato Soup just like my friend but I am not a fan of Campbell's Tomato ( I know thats sacrilege or some thing). I am a fan of fresh Roasted Tomato Soup so I ran it by my mother and she was all for it (My Dad hates it either way so we had it one day when we knew he wouldn't be taking a lunch to work)
So for my Mom and my friend Matt here is Roasted Tomato Soup:
3-4 ripe tomatoes (about 1 pound), cut in half
1/2 teaspoon extra-virgin olive oil
1 small red onion, chopped
1/2 teaspoon minced garlic
1 cup reduced-sodium chicken broth
1 tablespoon chopped fresh basil
Salt & freshly ground pepper to taste
Preheat broiler. Coat a baking sheet with cooking spray.
Place tomatoes on the prepared baking sheet, cut-side down. Broil until skins are blistered, about 10 minutes. Let cool. Slip off the skins and coarsely chop.
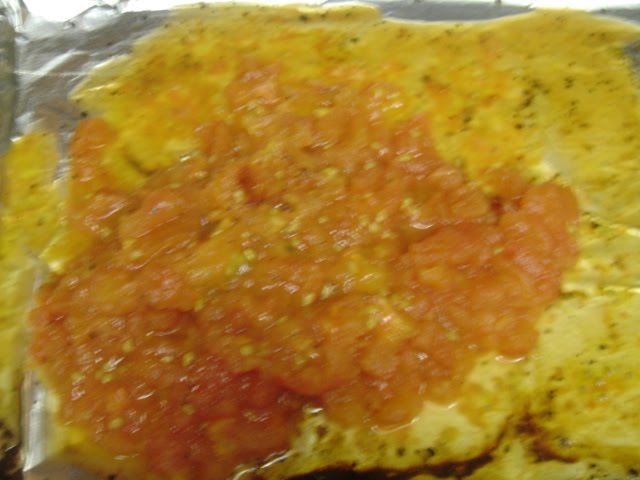
I chopped them and then put them right back on the foil sheet pan then brought the whole thing to the sauce pan when needed and used the foil to funnel it all into the pan with no loss of juice or tomato
Meanwhile, heat oil in a medium saucepan over medium-low heat. Add onions a little salt and pepper and cook, stirring often, for 3 to 5 minutes. Add garlic and cook, stirring, until the onions are very soft, 3 to 5 minutes longer.

Stir in tomatoes and cook, stirring, for 1 minute.

Transfer the mixture to a food processor or blender and process until smooth; return to the saucepan. Add your broth to the blender or food processor and pulse it til the sides are clear and then pour it into the saucepan (This is my trick for not wasting any of that great tomato flavor you just worked so hard for) Bring just to a boil, reduce heat immediately to low and simmer for 5 minutes. Remove from heat and stir in basil. Season with salt and pepper and serve.
If you are making this ahead for lunch/dinner the next day you can use dried basil just add it (1 tsp as its stronger) when you pour the broth into the saucepan.
You can enjoy this chilled in the summer and it will retain its sweet refreshing just off the vine taste just cover loosely and refrigerate until chilled, 2 1/2 to 3 hours.
Sorry I missed getting the final pic with this all done. But it was nice and smooth. Its not as RED RED as Campbells as its not as concentrated instead its a nice golden red.
This next dish was me trying to find something to do with pork chops and something other than roasting or making a cold salad out of fennel. I thought it was pretty good. For my Mom I would just roast the fennel again as she prefers it that way but would keep everything else about this as it has a nice braising liquid that keeps the pork chops juicy and gives a nice flavor.
Pork Chops with Braised Fennel and Lemon
4 (6-ounce) bone-in pork chops, about 1/2" thick
1 tablespoon extra-virgin olive oil 1 large fennel bulb, sliced into 1/2" strips
1 small onion, thinly sliced
1 cup lower-sodium chicken broth
2 tablespoon fresh lemon juice
Salt and freshly ground black pepper

Season pork chops with salt and pepper. Heat oil in a large skillet over medium-high heat. Cook pork chops until lightly browned, about 2 minutes per side. Transfer to a plate.

Add fennel and onion to the same skillet and cook until lightly browned and softened, about 3 minutes. Add broth and lemon juice, bring to a simmer, cover, and cook until fennel is crisp-tender, about 5 minutes. Uncover and simmer until liquid is reduced slightly, about 3 minutes.

Add pork back to the skillet and cook until heated through, about 2 minutes. Season with salt and pepper and serve hot.


I also served it with Brussel Sprouts tossed in olive oil and roasted for 20 mins at 400 degrees. I tossed them half way though so they would brown all over.
Oh yeah and that French Onion Soup that was mentioned a few minutes ago... Its super easy! I will post that soon. Got to keep you hooked don't I??


No comments:
Post a Comment
How that sound? Got Questions? Requests?